Friday, June 07, 2013

Early June on the Mtn Ranch

Jonathan and Steve have been doing fences the last few days. However, Jon went up alone one day with the camera and took some amazing pictures. I chose a few of the over 100 to share!
 I love all the flowers blooming up on the mountain during the spring. Yes, it is still spring up on the ranch. The fence of wild roses is rather stunning.


  Deer playing peek-a-boo!

Things you find in the pond-A GREEN dragonfly, a snail floating on the ceiling of the water, and polliwogs! 

This snail Jon took several photos of-finally, he saw it tilt and realised it was a snail underwater with it's foot on the bottom of the surface of the water~which is really strange. 

 At this time of the year, the pond is green and not full of pond weed, the cows have not torn up the edge of the pond, and everything is peaceful. I only hope the killdeer nest hatches out its babies (it was near the pond!).
 As Jon drove home, he captured the ranch in his mirror and camera (my camera). I think this is one of my favorite photos,.

Monday, May 13, 2013

Mole Rescue

Jon found a mole in the middle of a gravel drive-it was furiously attempting to get thru the gravel, but couldn't. So, Jonathan caught him and brought him home. We kept him overnight and learned so many cool things! Moles eat earthworms-they really like earthworms. We watered last night, so the yard had many night crawlers available for a young and agile man to snag. So, Jon did. He dumped several in the plastic tank where the mole was residing and we got to see some amazing action! It was like Tremors! (only with a mole) It dug and the soil jumbled around...it made two holes (one in each corner at this time) and it rose up out of a far hole, sniffed around and LUNGED! It snipped at a worm and snagged a HUGE one and pulled it into the tunnel. The one it snipped, stopped moving. We found out moles have a toxin they use when they bite worms so they can keep a worm larder underground. 
 We took out a bunch of dirt in order to get photos of our guest. He was pretty annoyed with us for messing up the tunnels he had made and he was also wanting to escape. Moles look like they are swimming in the earth and get oxygen from the ground-incredible creatures!
 Their 'hands' are made for moving earth and they move it FAST. They are mostly blind, so they don't see well and are rarely found above ground. They eat worms, invertebrates, and nuts. The worms, as I mentioned, are stored, but they also have traps in their tunnels so when a worm is caught, the mole can run and get it. Like an underground spider, only not as creepy!

After spending time with a mole, I am more understanding of the Redwall creatures. I almost talked to it in mole speech, but decided not to....We let him go in a nearby pasture and hope he has a great time digging in an area several blocks from his 'home'.

Tuesday, April 23, 2013

Tulip Time-

Blogger has become increasingly frustrating to use, which is why I have not updated in months! I decided I wanted to share my tulips with you-These are only a few of them. I do have some planters that are not blooming well and some of the older ones are not quite ready yet. I'll add those with photos from previous years-
 These tulips, the bright orange ones, are always the very first tulips to come up. There were so many I've moved them a bit to make a bank of orange. They are incredibly festive and I'd love to know their name!

 These are my second ones to bloom every year. I have two sets of red tulips-in this photo you can see the ones on the bottom are a bit different. I also have those star shaped tulips in a different part of the front bed. In this next (not able to be rotated) photo you can see the leaves are a different type as well.
BUT, this April, not all was well with the stratosphere. Or something. We ended up with a couple of pretty incredible frosts. As you can see, it was not encouraging to the fragile tulip blossoms.
These crinkled edge tulips look quite a bit like Audrey from Little Shop of Horrors!!!


 I did clip (the next day, after another frost), a ton of the orange ones. I realised if I put them in a tall vase, you wouldn't be able to tell they were droopy! As you can see, the petals show definite frost damage, but they did open and close, so we enjoyed them inside for several days.
 These are some I did not plant, they have peony like petals. It appears I don't have any photos of the white or yellow ones-I'll have to find them to photograph them this spring!
                                This one is a lovely pink tulip. Such a striking pattern on their petals.
As much as I adore daffodils, tulips are so lovely. I never look at one without thinking of my daddy (they were his favorite flower) and of fairy tales. The reason the tulips close up at night is so the fairies can sleep safely!

Thursday, January 17, 2013

Frosted Beauties

I grew up with something we called hoarfrost. Most people in the states are not familiar with this word, but it is so beautiful! A partial definition of this is from Wikipedia:  The name hoar comes from an Old English adjective for showing signs of old age, and is used in this context in reference to the frost which makes trees and bushes look like white hair. It may also have association with hawthorn when covered in its characteristic white spring blossom.
 Love looking at the birds as they perch in the frosted trees. They are so much easier to find!
 Hoarfrost is cold, beautiful, and very fragile. Buford Buckshot, being made of metal, was intricately decorated overnight.


More of the different foliage in the yard. Above right are black eyed Susan's and dollar plants, next to those is my golden willow we brought from the coast, and last are ivy leaves. Such incredible shapes and designs in the frost!
 
 I wandered over to my neighbor's house and caught some super funky crystals adhered to different kinds of yard art. I loved the frosted Christmas light and the LED snowflake below will look incredible lit up...if the solar powered panel got some daylight! (I'll have to go over tonight and see.)


I particularly love this little garden bug that was spinning in the breeze. And I also noticed, the breeze we had in the night made the frost crystals form on only one side of these dried flowers. Pretty cool, huh? 


I opened this post today with birds and figured it would be fun to close it with birds as well! Birds are so much fun!

Saturday, December 22, 2012

more recycled Christmas!

This one is blurry, it is a garland I made for over the bathroom mirror. Much less work than the real tree one. No pine needles in the sink!
These two decorations pictured are special. The greenish garland (I really need to spruce up the color next year!) is the one pictured in the Recycled Christmas post. It is a favorite since that doorway is horrid and looks bare all year long. The balls garland next to it was made by  our neighbor. She used some old Christmas balls, yarn, and Mardi Gras beads to create this. I was very impressed. 
 I made tiny decorations to put around our light fixtures in the stairwell. Kind of Dicken's in a modern sort of spin!
 I particularly love this garland. This is in an area with Ford decor, so the blue and silver and white matches perfectly! Making the bows is not as difficult as I thought it would be-I may have mentioned that before!


Tuesday, December 18, 2012

Recycling Christmas!

 I wanted garlands this year, but wasn't sure I'd get any. Jon is now an Eagle Scout and over 18 and is not working with the troop anymore, so I was skeptical as to where I'd get greens. Then, I had an idea! Why not use OLD FAKE tree parts to make things? I googled a bunch of sites and decided to try it for myself. So, for a whole $5 we picked up a bag of tree pieces that had gotten donated to the Salvation Army (without stems/trunks or bases--amazing what junk people donate!). In the bag were zip tied bundles of branches as well as two tree toppers. One of the toppers had ornaments on it and after looking at it, we realised it was a fiber optic set up. So, we stuck a flashlight under the bottom and WOW! The whole tree lit up in white. Now, being proud owners of much misc debris, we actually had a fiber optic panel thing. It plugs in and spins around and changes color. Steve made a base for the light panel that would hold the tree top and made a lovely Christmas tree for his mom. But the other stuff......oh my, oh my!

Here is Jon tearing apart one of the branches. On the floor are smallish metal rods, which are what make up each branch. Also on the floor and in the boot are what looks like curls of green doll hair (for those of you  who have played with doll making). I called it elf hair and am keeping the 'clean' stuff. This is the fiber wrapped around the rod and tree bits. Jon used an Xacto to shred down the branch and removed bits very quickly. 
When finished, we ended up with lots and lots of stem bits. I wasn't very pleased with the color, but I did find some greenish glitter to spruce a few up! (pun intended!)
All you need to do is take one longer bit and twist others around it. I used gloves because the trees were dusty and the wires inside were a little pokey. 


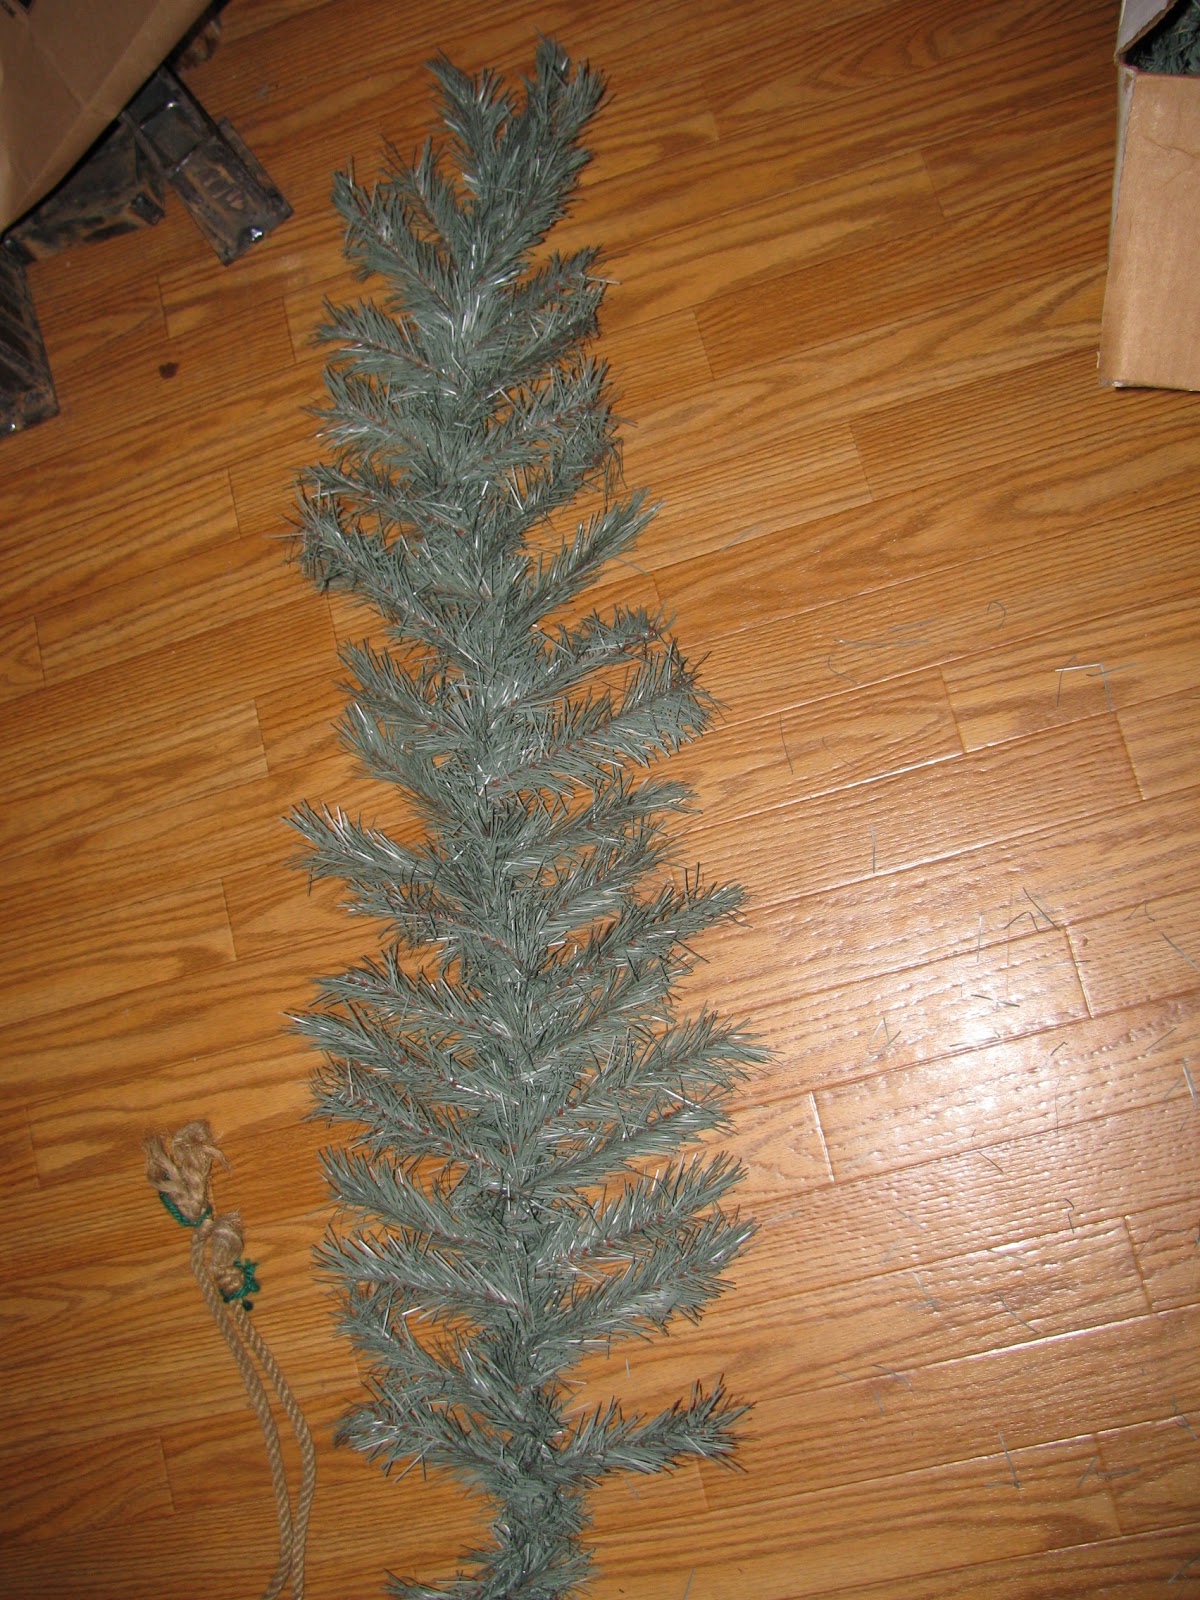
 As I added the bits, the garland started to take shape. I made a 4 foot garland in less than 20 minutes (the twisting/weaving part). Once I got one side as long as I wanted, I started the other side. Joining the two together in the middle made for a bulky center, but those I was able to cover up with ribbons. I think I have 7 inside garlands..so far! (only one is from real trees)

 This is one half of a garland. The circle was an experiment  I was trying to make a wreath, but alas..Adding bits to the circle made it look extremely odd! I'll keep working on it! However, making this circle clued me in to yet another way to make a garland. I took the 'string' of greenery and twisted the other bits around the string. Much like you do when making a real green garland, only the wire is already in the greens!

 Here you can see one half done and the other part being worked on. This actually went a LOT faster than just twisting the separate parts together one by one. I will most likely do all of my others using the 'string' method.

Here we have a 'swag' made from an unaltered tree branch (ok, I did add a couple of extra green stems to cover up the metal hook that you slide into the fake trunk on the tree!). It is adorned with a bow and an ornament. I thought it turned out rather well, but Jon doesn't care for the glitter on the bow! He added the lights. Also recycled! He had seen a shotgun shell light strand elsewhere and wanted to try his hand at it. He skipped the cleaning the shells step (cuz he is a fairly neat shooter, picking up other people's brasses and shells when he finds them on the ground) and he drilled out the proper size for the lights in the base of the shell instead of just crimping the tops closed. He liked them better this way. It took him longer to find a pattern of shell colors than it did for the rest of the project! The second photo is a finished garland. I liked that if it was not balancing properly on the curtain rod, we could squeeze the wires in the greens and MAKE it secure!
This wreath is a combination of inexpensive decor, some real tree greens, and a couple of hangers. The base of this wreath is hangers duct taped together. I used green yarn to hold the branches on and then added the rest of the decor later. (the bear thing you see is a pot  holder--I hang seasonal pot holders inside the door cuz they just  look fun!)

I hope if you find an old tree this Christmas on the side of the road ready for disposal, you save it and make something out of it. Fake trees take an incredible amount of time to decompose and it is better to recycle and reuse!